Add users
As a system administrator, you can enable self-registration of users. If self-registration is not enabled, administrators and organisation superusers need to create all user accounts.
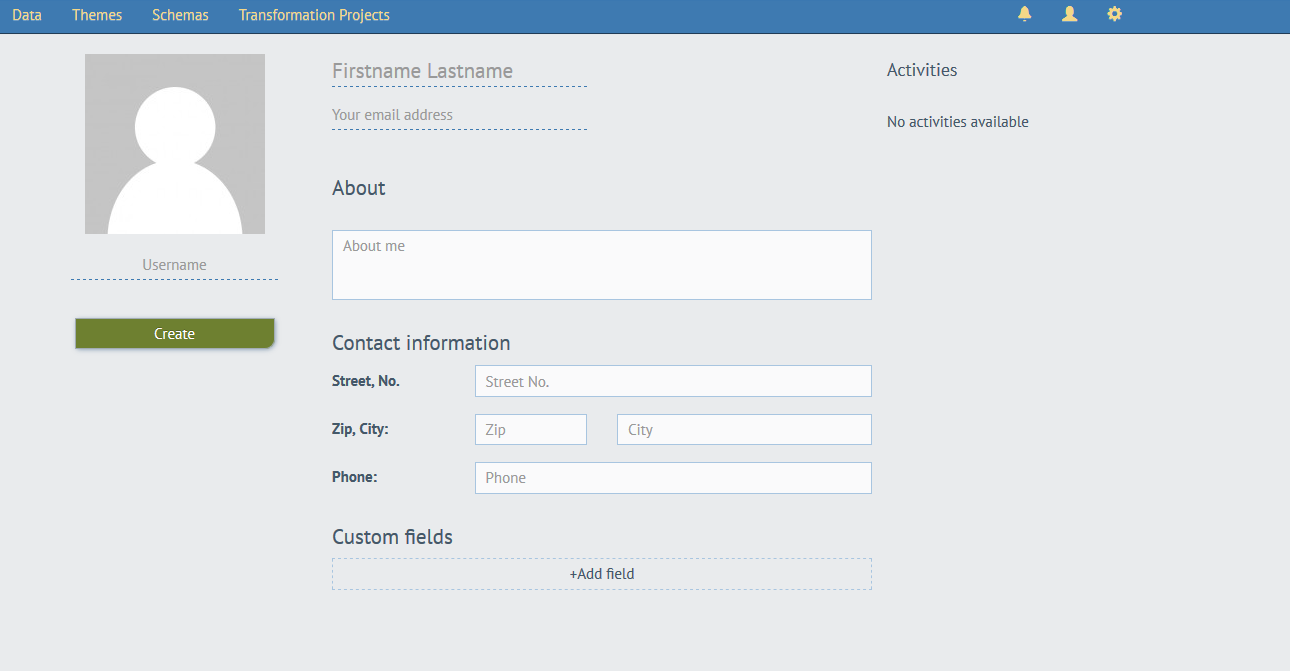
To create a new user account, follow these steps while logged in as an administrator or organisation superuser:
- Go to settings (gear symbol)
- Go to «Users»
- Pick «Create New User» at the bottom of the user list
- Enter a name (we strongly recommend using first and last name)

- Enter a username under the portrait
- Provide a unique e-mail address (every e-mail address may be associated with only one user account)
- Pick an organisation for the new user
- Pick a role (Data Manager, Theme Manager or Organisation Superuser)
- Optionally add a description, and contact info
- All role types can add custom metadata fields. Custom fields enable you to create your own key, value pairs for use in metadata. Click «+Add field» to enter a key, value pair. You can add as many custom fields as you need. Theme Managers and Superusers configuring metadata should come to an agreement with Data Managers on the custom metadata fields that will be implemented. Themes configured to use custom metadata fields in user profiles will access the value from the user profile of the person creating the dataset. The custom fields added to user profiles are available in the Autofill assistant when a Theme Manager or Superuser uses the metadata editor. For more information about using the metadata editor and working with autofill rules, visit the Edit metadata configuration section of our help.
- Click «Create»
The person you've created the account for now receives an activation e-mail. The account will be activated only when the person has clicked the link in the notification and successfully sets a password.
Alternatively, you can create a new user account while managing your organisation. Go to settings (gear symbol), go to «Organisations» and click «Create user» under the portrait.