Creating a profile using the hale»connect Profile Management Tool (PMT)
hale»connect Profile Management Tool (PMT)
Profiles can be a powerful tool to implement metadata standards such as ISO 19115. However, they often become very complex and demand a lot of work to create and maintain. Profiles are often described in excel tables or other tools with hundreds of entries. Entering and maintaining data, ensuring that it is compliant with validators and then testing can prove to be overwhelming. The hale»connect Profile Management Tool (PMT) enables you to easily define and manage profiles. With little effort, you can implement profiles using editors and validators and ensure that your metadata complies with constantly changing requirements.
Profiles
In hale»connect, a profile describes the extension of a schema through the definition of rules applied to data model elements. A profile is defined by consistency constraints and tag definitions which are applied to schema elements.
A profile specifically contains the following types of information:
Type obligation
Type obligation enables users to determine whether a type must be present in a data set. Profiles may have additional rules, or more strict rules than the original schema. 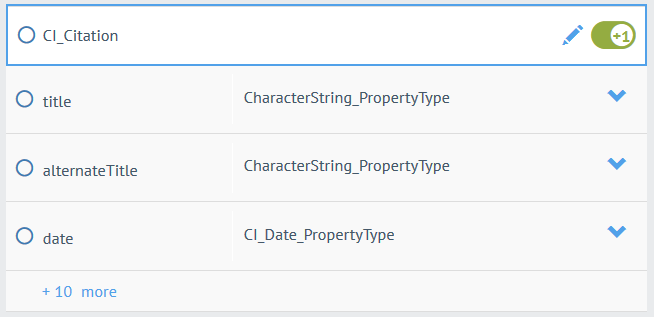
Attribute obligation
Attribute obligation allows users to determine whether an attribute must be present in a data set. Here are some examples:
Require that content is present in a property (cf. nillable flag) 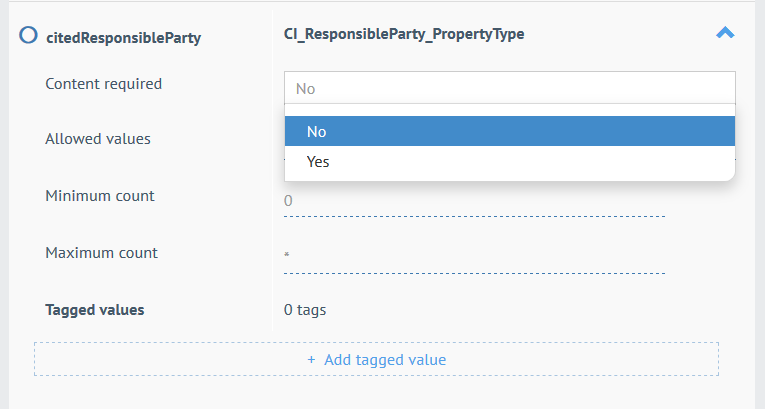
Set allowed maximum and minimum cardinality e.g. from unbounded in the schema to exactly 1 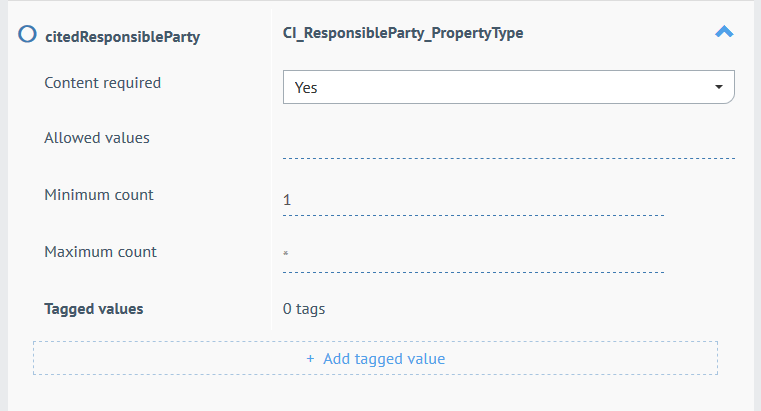
Domain restrictions
Domain restrictions allow users to manage specific code lists and remove codelist values, if required.
Domain restrictions can also be used to enumerate allowed values. 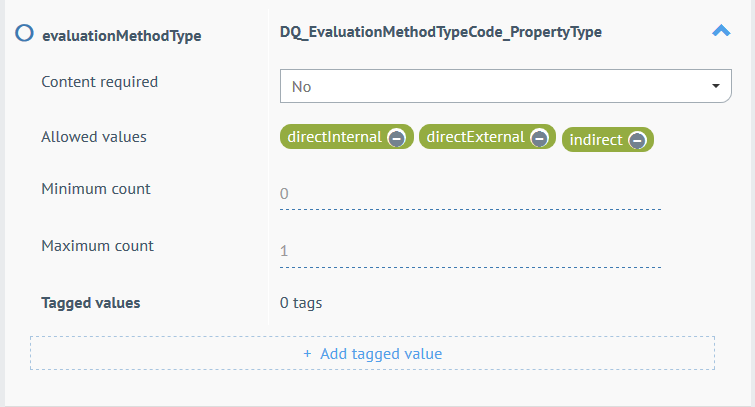
Type restrictions
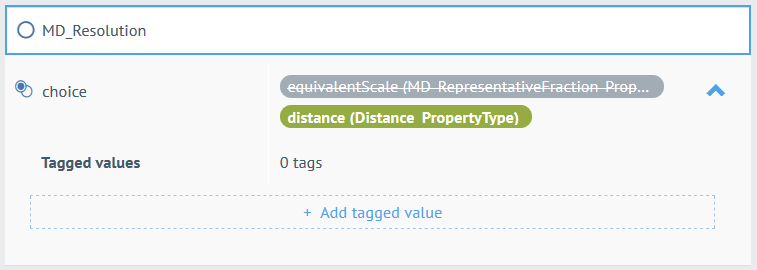
Type restrictions can be used to require a certain property type where otherwise multiple types are allowed e.g. limiting choices or anyTypes
Consistency constraints
Consistency constraints can be used to test across multiple elements.
Value dependencies can be defined on profile elements, e.g. When Element A has value X, Element B must have value Y.
Existence dependencies can be defined on profile elements, e.g. When Element A exists, Element B must not exist.
Combinations of value and existence dependencies can also be defined, e.g. When Element A has value X, Element B must not exist. 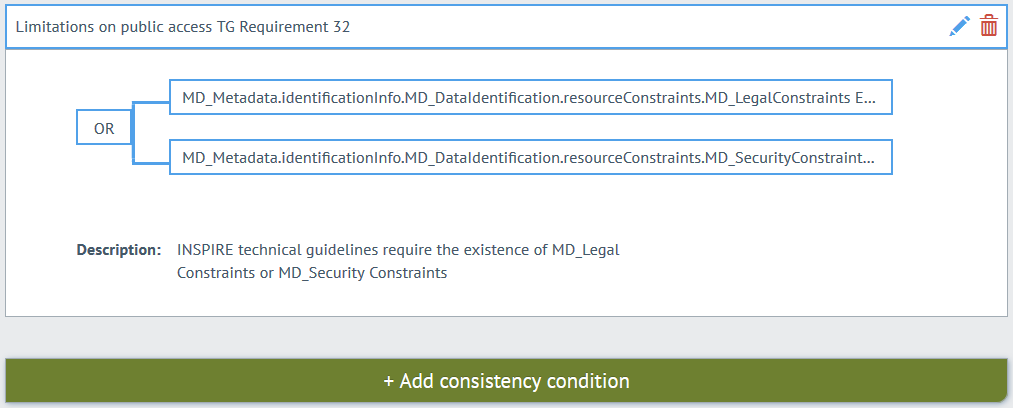
Creating a profile using the hale»connect Profile Management Tool (PMT)
In this tutorial, you will create a profile based on the CSW 2.0.2 Metadata Application schema.
- Go to «Schemas» on the main toolbar.
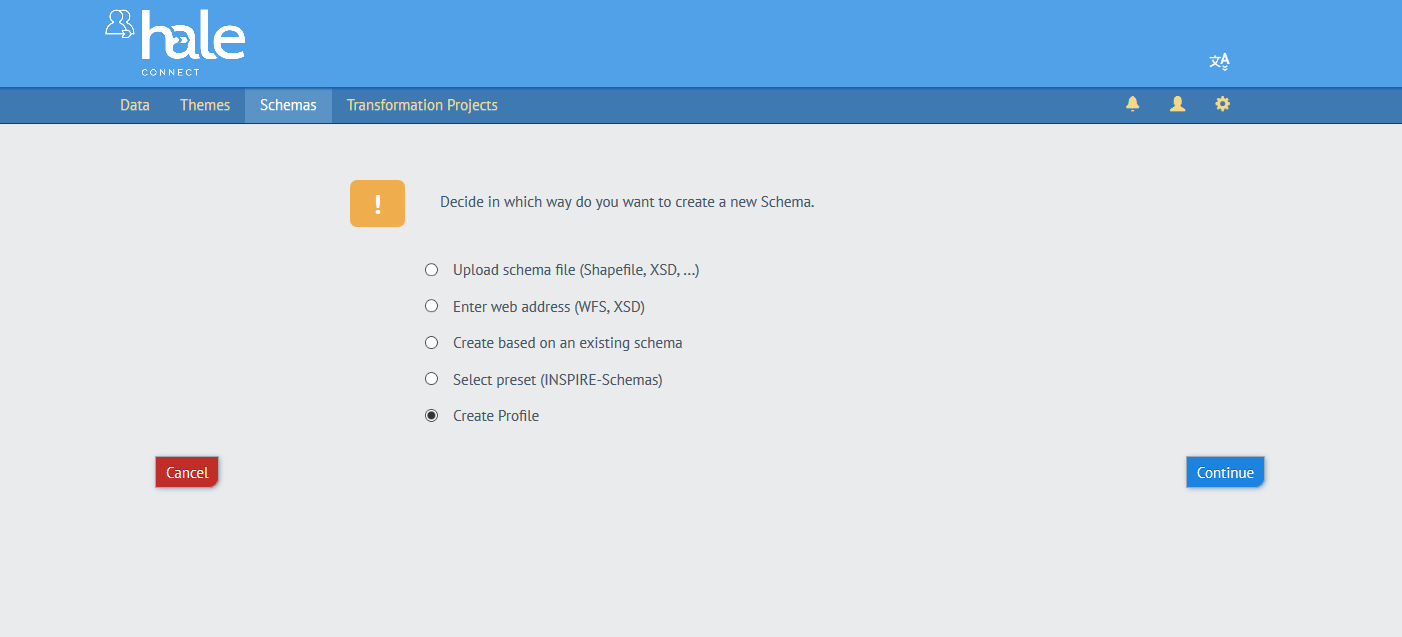
- Go to «Create new schema» at the bottom of the schema list, chose «Create profile» and click «Continue».
- Add profile information. Next, provide the name, author, version and description of your profile. When you are finished, click «Continue».
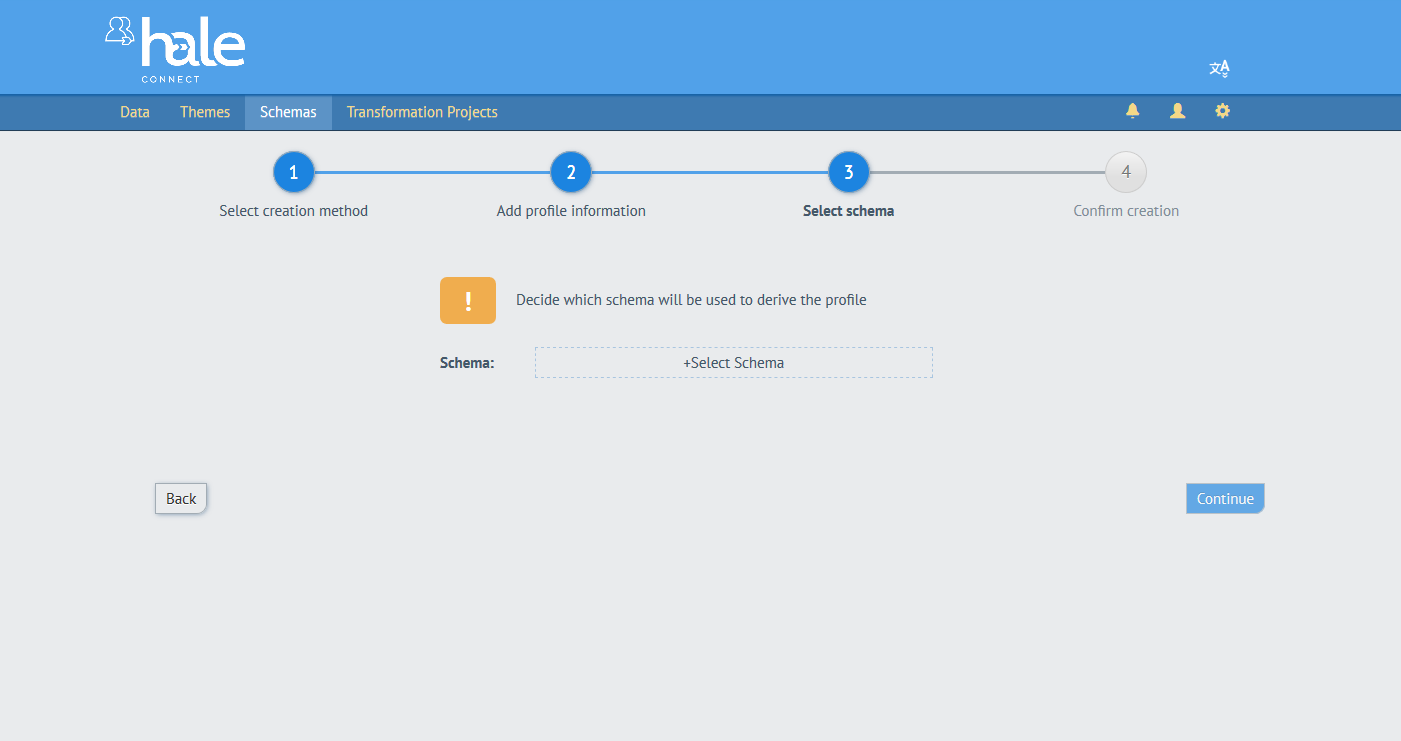
- Select the schema your profile will be based on. Click the «+Select Schema» button and navigate to the CSW 2.0.2 Metadata Application schema on hale>>connect. Click the » to select it. When you are finished, click «Continue».
- Confirm creation. In the final step, review your profile. You have the option to add or create a theme for your profile. When you are finished, click «Create» to generate the profile.
You can add type and attribute obligations, domain and type restrictions and consistency constraints to your profile after it is created.
Adding a type obligation
Navigate to your profile and click the «Feature types» section. In the search bar, type "CI_ResponsibleParty". Scroll the result list and toggle the switch next to the edit icon to make the type mandatory.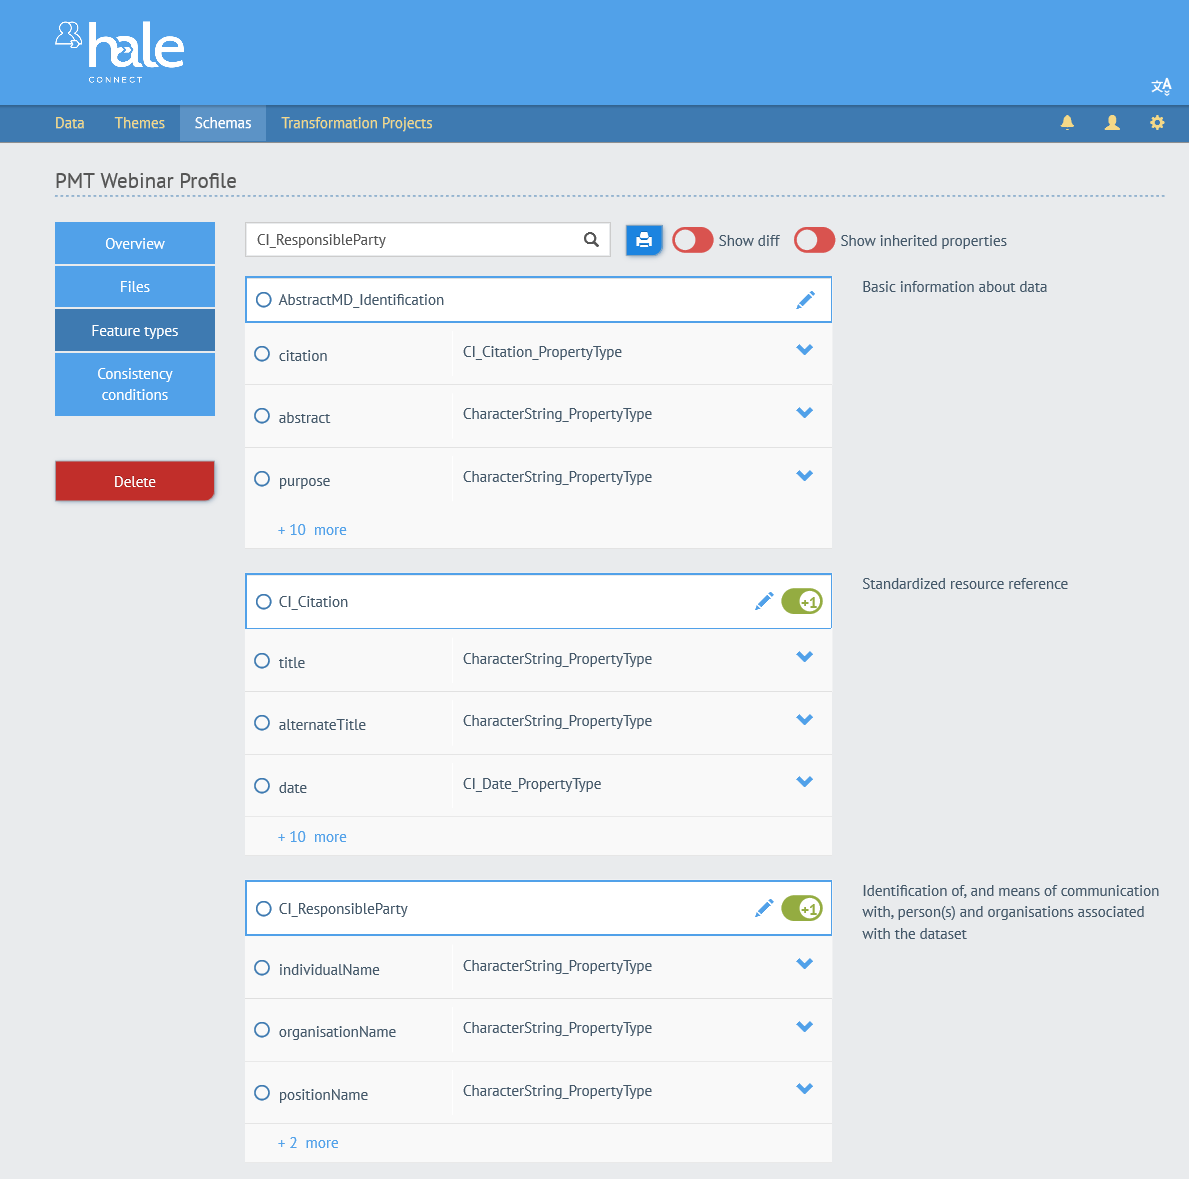
Adding an attribute obligation
To add an attribute obligation to the type "CI_ResponsibleParty", click on the edit icon. Click on the highlighted text "more" to expand the list of attributes. Next, click on the arrow next to "organisationName" to expand the list of options associate with the attribute. To change the cardinality of the attribute, change the minimum and/or maximum count by entering a number. To require content in the attribute, click the dropdown menu next to the label "Content required" and select a value.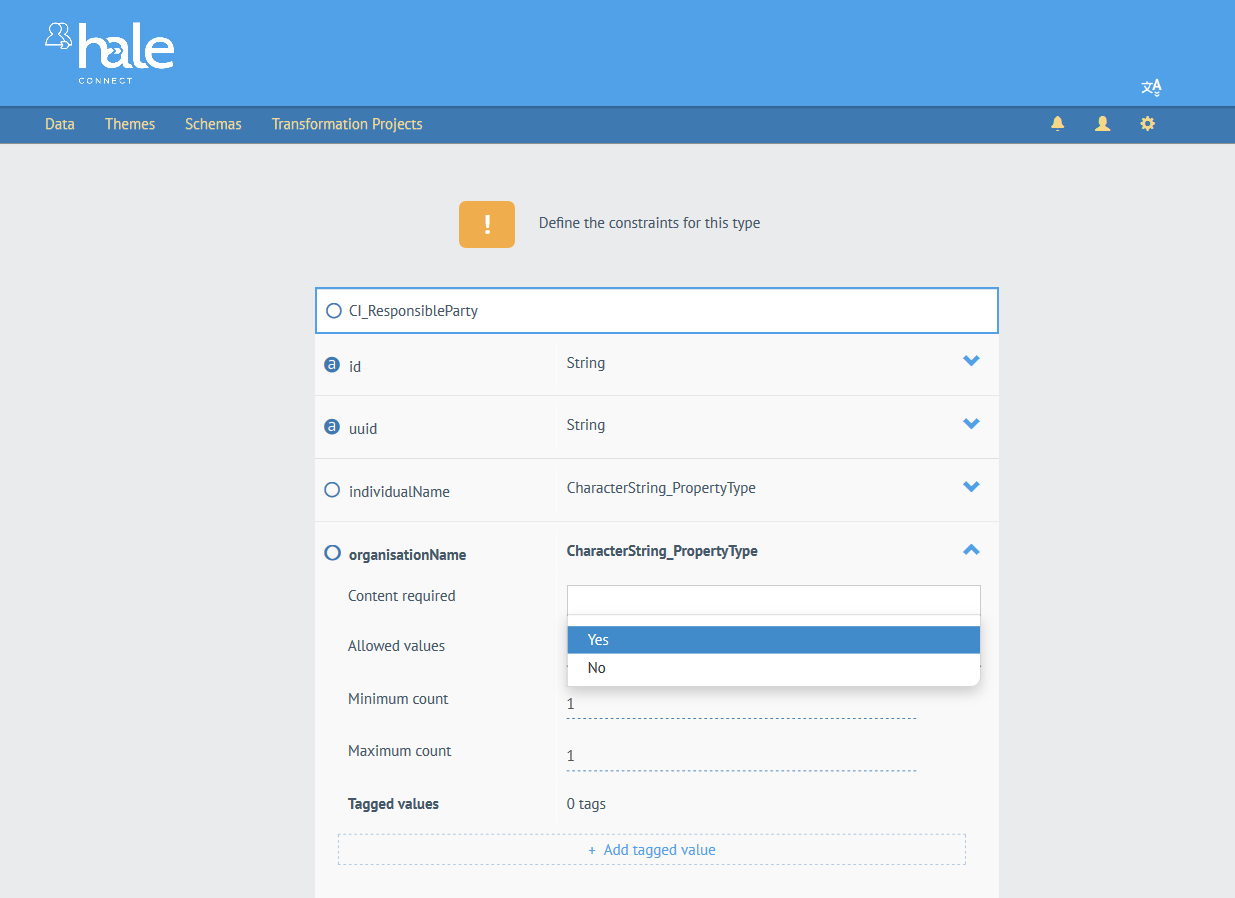
Adding a domain restriction
Next, add a domain restriction to the attribute "role". Scroll to the bottom of "CI_ResponsibleParty" and click the arrow next to "role". Click on the codelist value "author" to remove the value from the list of allowed values.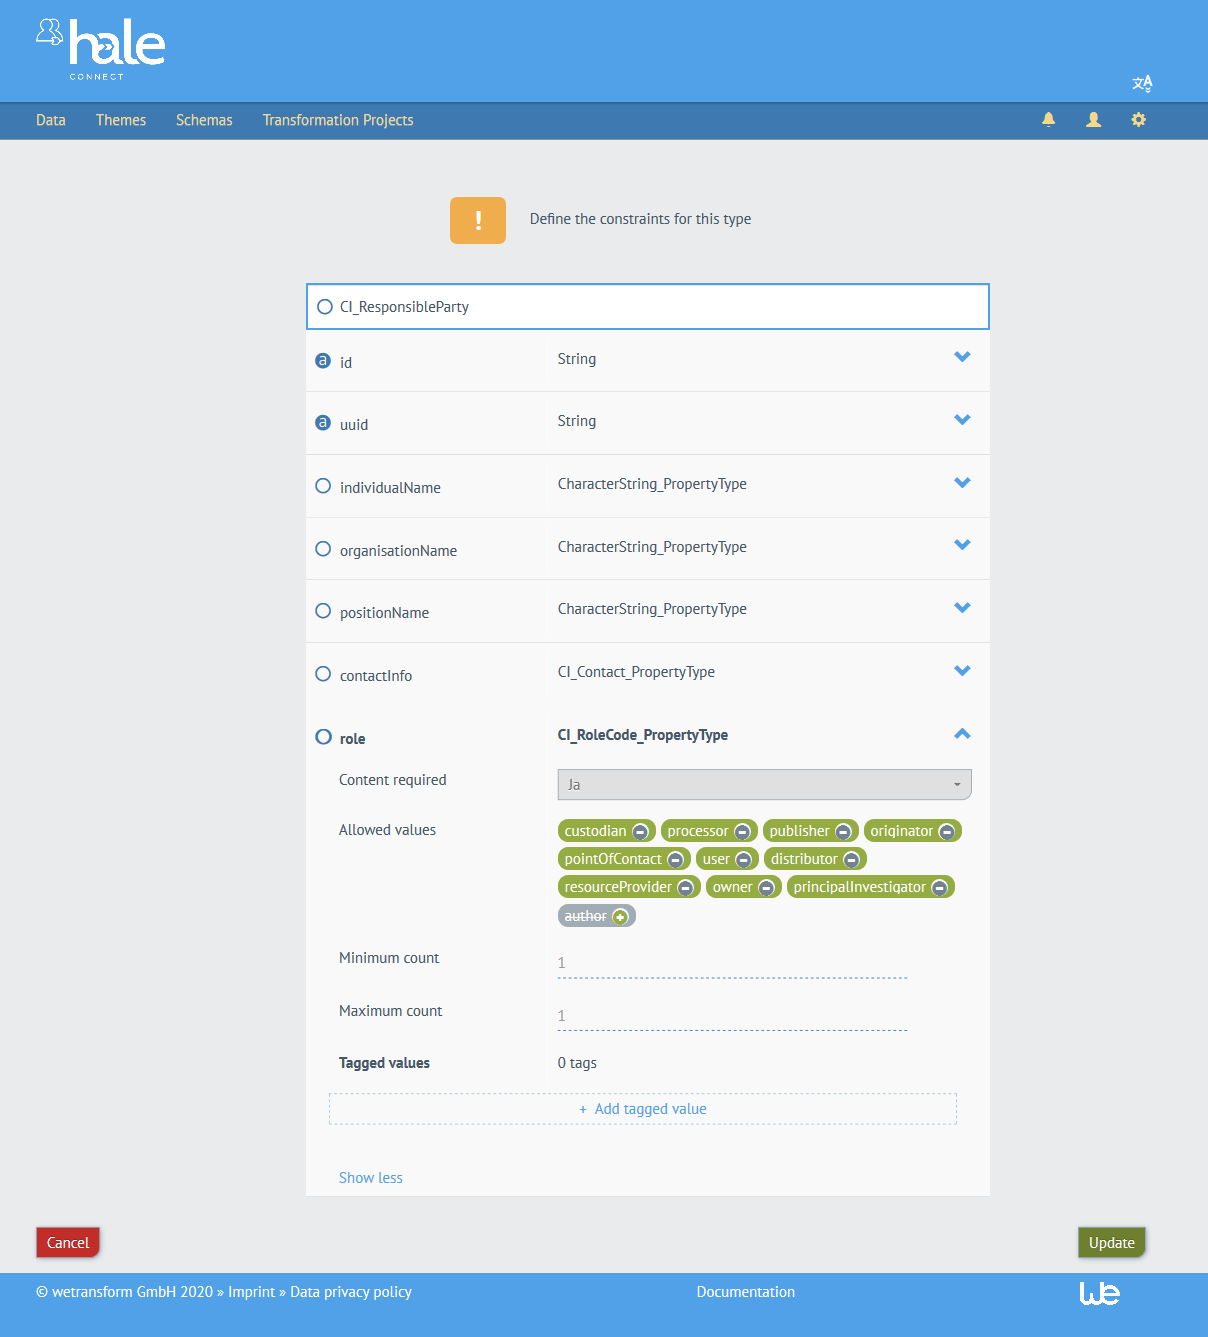
Click «Update» to save your changes to "CI_ResponsibleParty".
Adding a consistency constraint
INSPIRE technical guidelines require the existence of MD_Legal Constraints or MD_Security Constraints. You will add a consistency constraint to the profile to enforce this requirement.
Navigate to the «Consistency constraints» section of your profile. Click «+Add consistency condition».
The first step is to choose one or more operators from the dropdown list of operators. Select the "OR" operator. Next, click «+Create condition». Type MD_Metadata in the first field and navigate the schema to find the following attribute: MD_Metadata.identificationInfo.MD_DataIdentification.resourceConstraints.MD_LegalConstraints
Click the attribute MD_LegalConstraints and select "EXISTS" from the dropdown menu that appears. Scroll to the end of the dialog and click «Confirm» to add the condition.  Repeat the step above to add the second condition to the consistency constraint. Type MD_Metadata in the first field and navigate the schema to find the following attribute:
MD_Metadata.identificationInfo.MD_DataIdentification.resourceConstraints.MD_SecurityConstraints and add the EXISTS condition.
When you are finished, scroll to the end of the dialog and click «Confirm» to add the condition.
Executable test framework and Executable test suite
ETF is an open source testing framework for validating spatial data, metadata and web services in Spatial Data Infrastructures (SDIs). For more information, visit the following link About ETF.
The «Files» section of a profile contains options to download a test suite and an example XML document based on the profile definition.
A profile must contain valid sample values for all mandatory feature types and properties to enable the generation of an example XML file. A profile with at least one condition must exist to enable the download of a test suite. The format of the test suite is ETF / BaseX due to the desired compatibility with the AdV and GDI-DE test suites (under development) and the INSPIRE Reference Validator. To use an ETF test suite, it must be exported and set up in an ETF installation.
In the hale»connect Profile Management Tool (PMT), tagged values can be used to identify profile elements that will be used to generate test suites and example files.
There are a number of different tagged values:
- Testcase-label (ATS-Titel): The reserved tag testcase-label can be used to label the test case in the ETF test suite.
- Testcase-description (ATS-Beschreibung): The reserved tag testcase-description can be used to describe the test case in the ETF test suite.
- Module-id: The reserved tag module-id can be used to signify that a test case belongs to a module, or group of tests, that are grouped together in the ETS file.
- Example: The reserved tag example can be used to provide an example of a valid value for the element.
- Example XML: The reserved tag example-xml enables users to provide an XML fragment as an example value in the example XML document export. Fragments must be valid, parsable XML. If the fragment includes namespaces, the namespaces must be defined in the fragment. Example of a valid fragment:
<gco:CharacterString xmlns:gco="http://www.isotc211.org/2005/gco">Example-text</gco:CharacterString>
- Freely defined tagged values
Creating example XML test data and a test suite
You will create a test suite based on our profile and an example XML file using tagged values. Tagged values can be used for multiple purposes:
- Tagged values can be used to provide example values that will be inserted into an XML example file which can be downloaded
- Tagged values can be used to organize the structure of your ETS file
You can add a tagged value to provide an example value which will appear in the example XML file.
Navigate to your profile and click the «Feature types» section. In the search bar, type "CI_ResponsibleParty" and return to the feature type that you worked with earlier. To add a tagged value to the type "CI_ResponsibleParty", click on the edit icon. Navigate to the "CI_ResponsibleParty" attribute "organisationName", expand the attribute using the chevron and click «+Add tagged value». Select the tag name "example" from the tagged values dropdown menu. In the text field, enter the value: wetransform.
When you are finished, click «Update» to add the tagged value. Multiple tagged values for the same tag name are not possible.
Navigate to the «Files» section of your profile. Click the «Download as Test Suite» button to download an executable test suite file and click the «Example XML Document» button to download a sample XML file which can be used to test your profile, and provide a valid example of data which complies with the profile's requirements. Open the downloaded sample XML file in an XML editor to view the "CI_ResponsibleParty" element and the value you supplied using a tagged value: wetransform.
You will need to set up a running instance of the ETF to run your executable test suite file. Visit the ETF GitHub page for more information.