Schema updates in hale»studio and on hale»connect
In February 2024, several INSPIRE GML application schemas were updated. Data harmonized using v4.0 schemas, which currently have a v5.0 available, must be re-transformed using an updated transformation project to be compliant against the latest version of the schema. Breaking changes have also been introduced to v4.0 schemas, although no major version change was made. Automated online transformation workflows configured on the hale»connect platform can be easily updated to use a new schema version to publish, transform and validate datasets and services within minutes.
This tutorial reviews the steps required to update the schema used in automated online transformation workflows. Updating an online transformation workflow requires the update of multiple resources and it must be performed by a user with Theme manager or Superuser permissions. Before we begin, let's review a list of the resources we need:
- a hale»studio transformation project
- a schema(s) for your target data
- a target theme
Tutorial data
The installation of hale»studio and the creation of alignments are beyond the scope of this tutorial. For more information, visit hale»studio.
For this tutorial, we will use:
- An existing hale»studio transformation project. You can download the transformation project here.
- Source data. You can download the shapefile here.
The transformation project maps German protected sites data to the INSPIRE feature type ProtectedSite, which is found in the INSPIRE Protected Sites 4.0 schema.
Updating a Transformation Project
Step 1: Open an existing transformation project in hale»studio
A transformation project is a hale»studio project using the formats *.halex or *.halez that has been uploaded to hale»connect. The project contains references to source and target schemas, an alignment that defines the transformation by mapping elements from the source schema to elements in the target schema, additional configuration for the loaded schemas and configuration options for the desired output.
If you have hale»studio installed on your computer, you can load the transformation project named "INSPIRE_ProtectedSites.halex" which is included in the tutorial data.
Step 2: Update the INSPIRE schema used by the transformation project
The next step is to update the schema used in the transformation project, so that it uses the INSPIRE Protected Sites schema version 5.0 instead of 4.0.
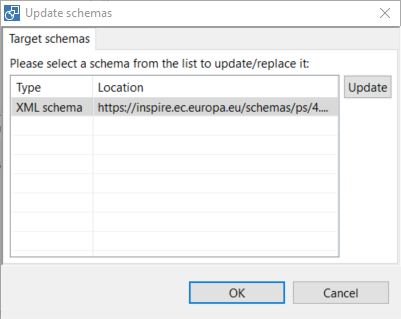
In hale»studio navigate to the File menu and select the option to Reload and update schemas. In the dialog that appears, double-click on the schema URL that is displayed and navigate to the INSPIRE presets and select the INSPIRE Protected Sites 5.0 schema. 
Click «OK». The INSPIRE schema used in the transformation project is updated to v5.0.
Step 3: Load source data and complete cell entity matching
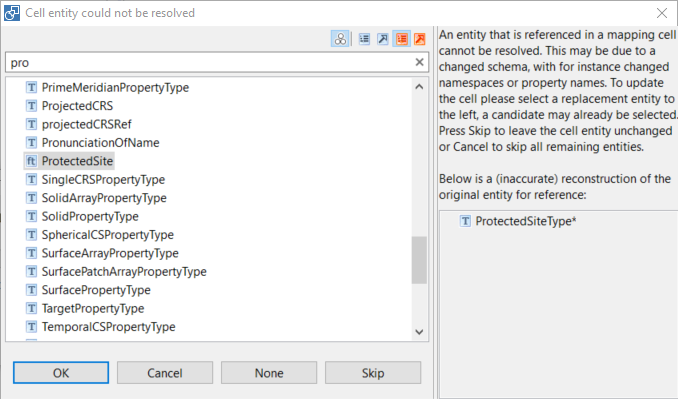
In this step, we will load the source data and complete the steps displayed in the cell entity matching dialogs that appear in hale»studio. Cell entity matching dialogs appear when a schema is changed and hale»studio cannot determine how to update the existing mappings due to changed type names, property names or changed namespaces. In these cases, the end user must provide hale»studio information on how to update the existing mappings, based on the new schema.
It is useful to review the changes that have been made to the schema you are updating to obtain an overview of the elements that need to be updated. The changes are documented as comments in the INSPIRE *.xsd schema files available here.
First, load the source data in hale»studio. Navigate to the File menu and select Import, next, select Source data...
Once the source data is loaded, a potentially large number of cell entity dialogs will appear successively until all elements have been updated to reflect the new schema. A complete update requires the end user to manually select the element in the element tree that hale»studio is searching for, for each updated reference. In some cases, hale»studio will correctly identify the matching element in the new schema (for example if only the namespace changed but the type and property name remain the same), in other cases, direct user input is required. It is possible to skip one or more mappings in the dialog if the handling is not fully clear. Skipping a mapping allows the end user to continue with automatically assigned, or recognised mappings, without having to cancel the entire process. Unhandled mappings can be edited afterwards in the hale»studio UI. 
Step 4: Check validation and save transformation project
Once all cell entity matching has been completed, take a moment to check the validation of the updated transformation project to ensure that all required schema elements have been handled properly. In hale»studio, open the Report List window to view the status of the instance transformation and the instance validation. A green check indicates a valid project. A yellow warning indicates that the project contains mappings with warnings that can be reviewed in the Properties window. Double-click on the instance transformation and the instance validation text in the Report List window to view more information about warnings in the Properties window.
Once your check is complete, save your project.
You can export the INSPIRE_ProtectedSites transformation project directly to your hale»connect account once you are finished updating the project. If you need help, visit the hale»studio User Guide help topic Share and update a transformation project on hale»connect for further instructions.
You can also upload a transformation project manually.
Updating an Online Transformation Workflow on hale»connect
Step 1: Create a new schema
The updated transformation project you are working with transforms German Protected Sites data to INSPIRE Protected Sites v5.0. These INSPIRE feature types are found in the INSPIRE Protected Sites 5.0 schema, so you will create this schema on hale»connect. hale»connect contains a large number of schema presets, including all of the updated INSPIRE schemas.
To create a new schema using a schema preset, follow this workflow logged in as a Theme Manager or Superuser:
-
Go to “Schemas” on the main toolbar
-
Go to “Create new schema” at the bottom of the schema list
-
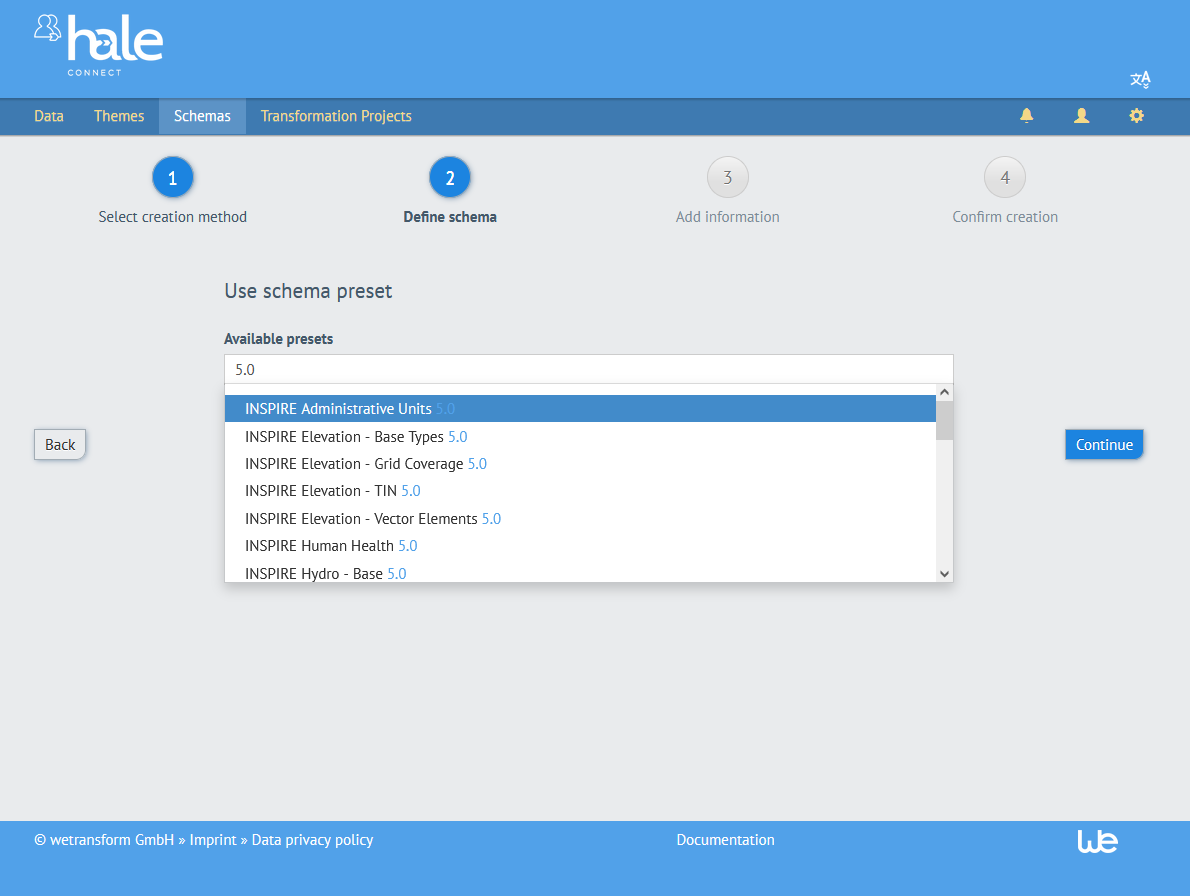
Select creation method. In the first step, select «Select preset». Click «Continue»
-
Define schema. Next, define the schema you want to use. The schema definition is determined by the creation method.
-
Select the INSPIRE Protected Sites 5.0 schema preset from the dropdown list of available presets.

-
Add information. Provide the name, author, type and version of your schema. When you are finished, click «Continue»
-
Confirm creation. In the final step, review your schema. You have the option to create a theme for your schema. For this workflow, you do not need to enable theme creation. When you are finished, click «Create» to save the schema.
Step 2: Update the feature types of the target theme
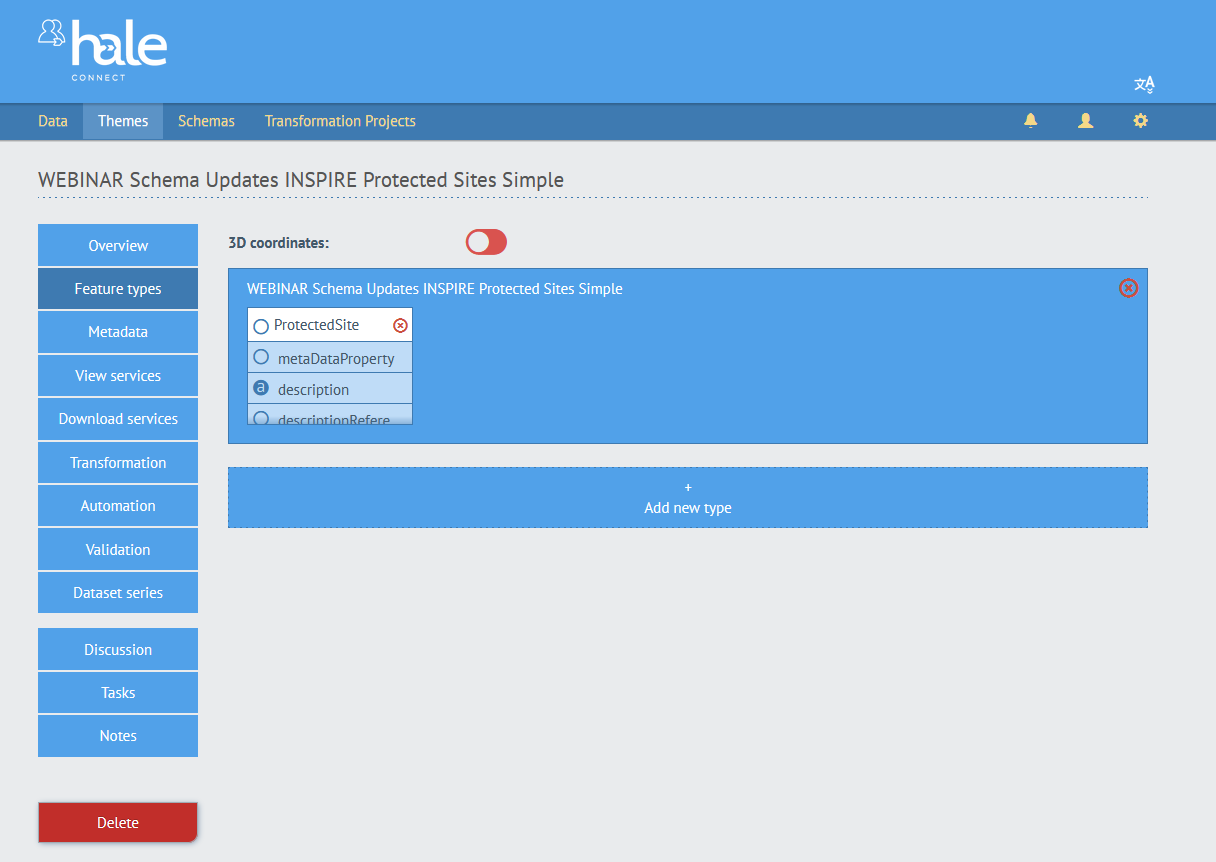
The next step is to update the Feature Types section of your INSPIRE Protected Sites theme to use the feature types from the INSPIRE Protected Sites 5.0 schema.
First, navigate to your existing Protected Sites theme on hale»connect. Select the Feature Types section.

Click the red "x" to delete the existing feature types and click on «+ Add new type». Navigate to the INSPIRE Protected Sites 5.0 schema in the dialog that appears and select «Add all». Your existing theme is now updated to use the feature types from the INSPIRE Protected Sites 5.0 schema.
Step 3: Trigger the updated transformation project and republish existing resources
Once you have updated your transformation project and updated the feature types in your existing target theme, you can re-run the online transformation to update your published resources on hale»connect.